Serving The Jacksonville Area



How to Flush a Water Heater in Jacksonville: Step-by-Step With JAX Water
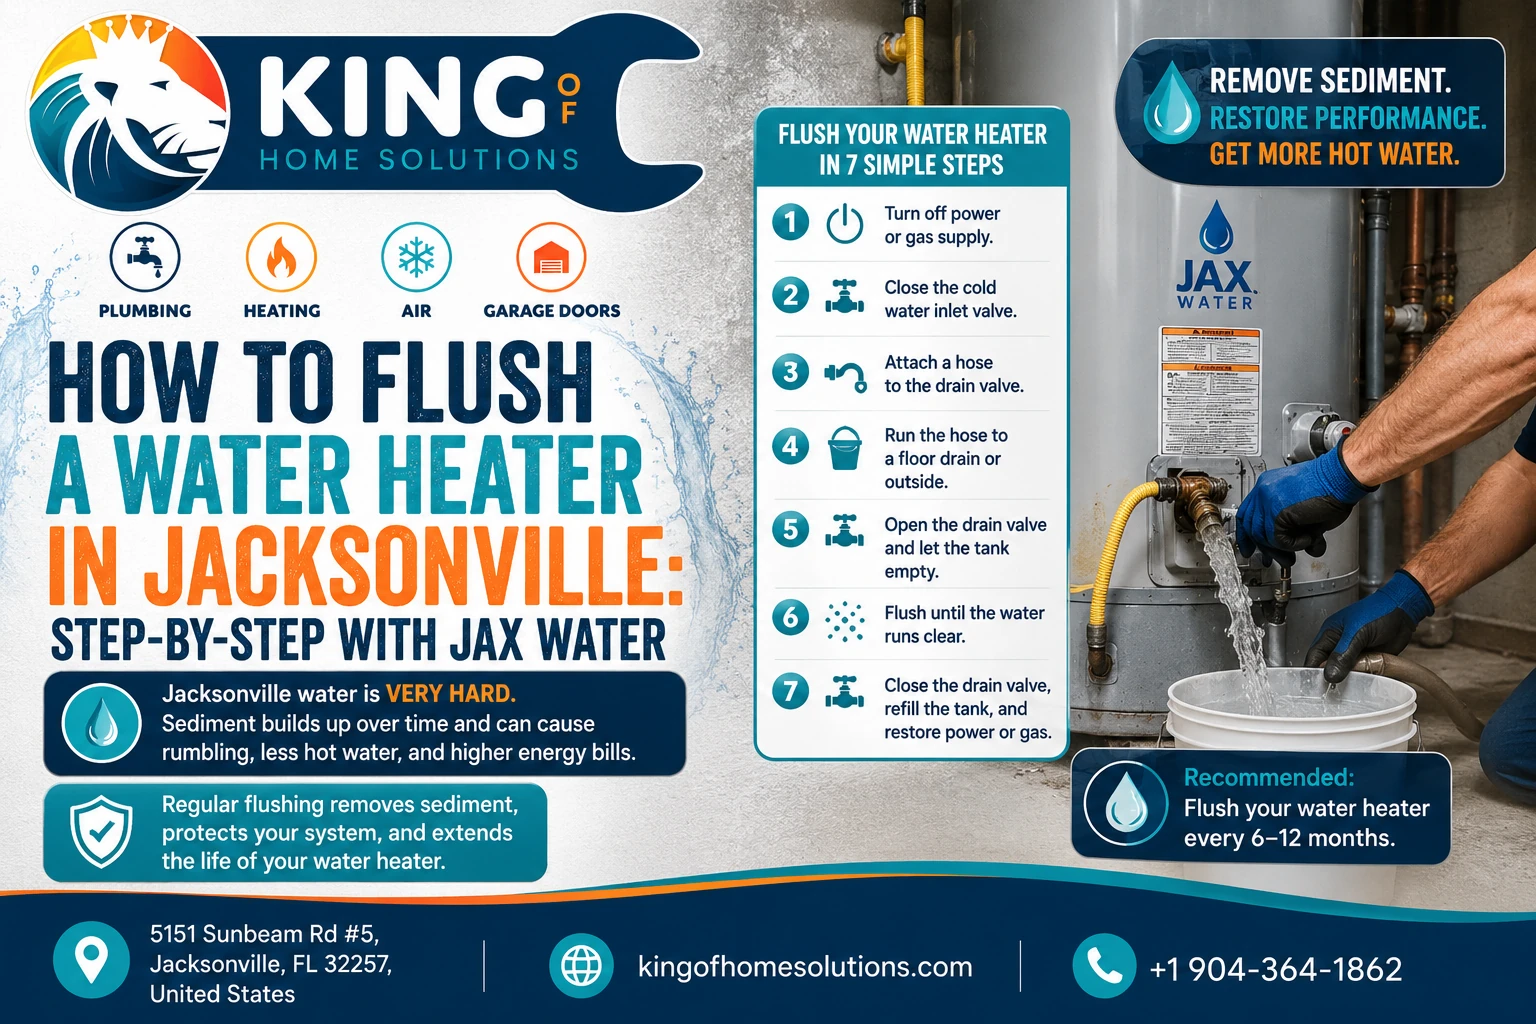
How to Flush a Water Heater in Jacksonville: Step-by-Step With JAX Water
If you live in Jacksonville and your water heater has started popping, rumbling, taking longer to recover, or giving you less hot water than it used to, there may be a surprisingly simple reason:
Sediment.
And Jacksonville water gives homeowners a good reason to pay attention to it.
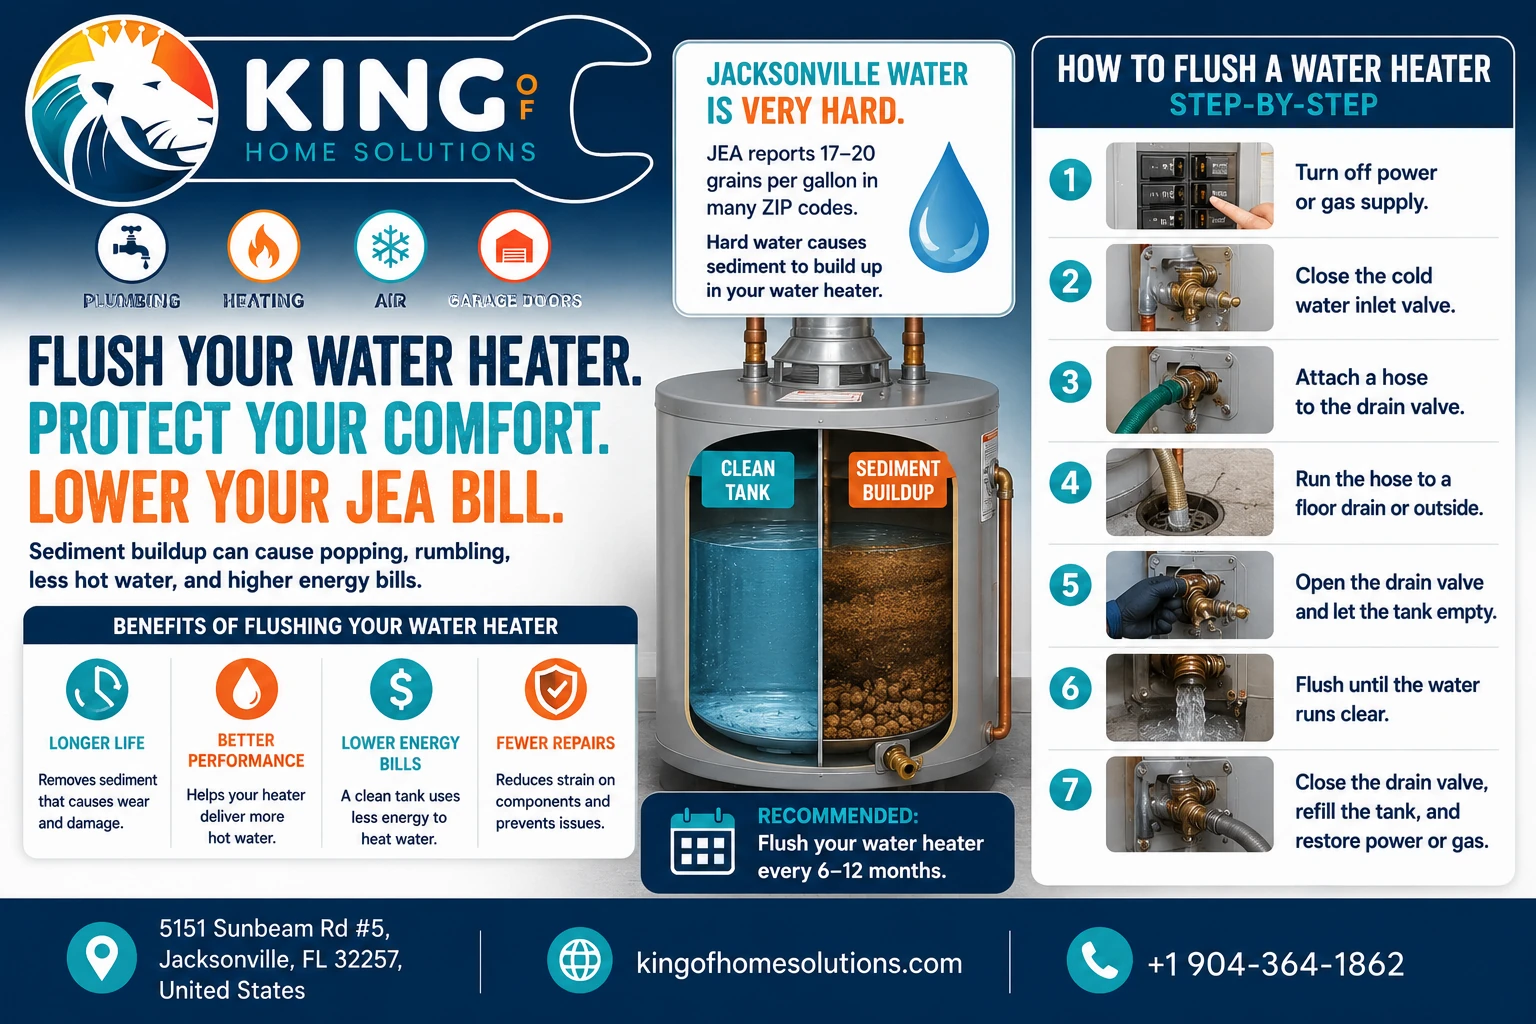
JEA draws its drinking water from the Floridan aquifer, where naturally occurring calcium and magnesium contribute to water hardness. In many Jacksonville ZIP codes, JEA currently classifies the water as “very hard.” For example, JEA lists approximately 17 grains per gallon in 32207, 20 grains per gallon in 32216, and 20 grains per gallon in 32256.
Those minerals are not a health problem.
But inside a water heater, mineral buildup can become a maintenance problem.
Over time, sediment can collect at the bottom of a traditional tank-style water heater. Flushing the tank periodically helps remove that accumulation before it becomes severe.
Here is how Jacksonville homeowners can do it safely.
Need Your Water Heater Flushed?
Clear sediment buildup and keep your hot water flowing. Call now for professional water heater service in Jacksonville.
Why Jacksonville Water Heaters Need Flushing
JEA considers water above 180 parts per million to be very hard, and much of Jacksonville exceeds that threshold. JEA’s current hardness table lists many Jacksonville-area ZIP codes between roughly 11 and 20 grains per gallon, with some surrounding areas even higher.
Hard water contains dissolved calcium and magnesium.
As water is heated, some of those minerals can contribute to deposits and sediment inside the tank.
That buildup tends to settle at the bottom right where the heating process takes place.
Eventually, homeowners may notice symptoms such as:
- Popping or rumbling noises
- Cloudy or rusty-looking hot water
- Less available hot water
- Longer recovery times
- Increased energy use
Rheem identifies those as common signs that a tank may be due for flushing.
In Jacksonville, where hard water is common, this is maintenance worth knowing how to do.
Before You Start: Make Sure You Have a Tank Water Heater
These instructions are for a traditional tank-style water heater.
If you have a tankless water heater, stop here.
Tankless units typically require a separate descaling procedure, often involving service valves, a circulation pump, hoses, and an approved descaling solution or vinegar depending on the manufacturer’s instructions. Rheem, for example, provides a separate procedure for circulating vinegar through certain tankless systems.
Do not use the following tank-draining procedure as a substitute for your tankless manufacturer’s maintenance instructions.
What You’ll Need
Before beginning, gather:
- A garden hose
- Work gloves
- A bucket
- Towels
- A flat-head screwdriver if your drain valve requires one
You’ll also need somewhere safe for the water to discharge.
Remember:
The water coming out may be extremely hot.
Do not direct it somewhere that could burn a person, damage plants, damage flooring, or create a slip hazard.
Step 1: Turn Off the Water Heater
This is the step you do not want to skip.
If You Have an Electric Water Heater
Turn off the water heater’s circuit breaker at your electrical panel.
Do not simply turn down the thermostat.
The heating elements must not operate while the tank is empty.
An electric heating element that energizes without being submerged can be damaged very quickly.
If You Have a Gas Water Heater
Follow the manufacturer’s shutdown procedure.
Depending on the model, that may involve turning the thermostat or control to the appropriate shutdown or pilot setting.
If you are uncomfortable working around gas equipment, have a plumber perform the service instead.
Manufacturer instructions should always take priority over a generic guide like this one.
Step 2: Shut Off the Cold-Water Supply
Look at the top of your water heater.
You should see a cold-water supply line entering the tank.
Close its shutoff valve.
This prevents the tank from continuously refilling while you try to drain it.
Step 3: Let the Water Cool
This is one of the safest things you can do before draining the tank.
Water heaters commonly store water hot enough to cause serious burns.
After turning off the heat source, allow the water to cool before you begin draining.
You can also carefully run hot water from a fixture to help reduce the amount of very hot water remaining in the tank, provided you follow your manufacturer’s instructions.
A.O. Smith’s homeowner guidance similarly recommends shutting off the heater and allowing the water to cool before draining.
Step 4: Connect a Garden Hose to the Drain Valve
Near the bottom of your water heater, you’ll find a drain valve.
It usually resembles an outdoor hose connection.
Thread your garden hose securely onto it.
Run the other end of the hose:
- To a suitable floor drain
- Outside to an appropriate drainage location
- Or into a sufficiently large container if your setup allows
Avoid creating a tripping hazard across a garage or walkway.
And remember that the first water leaving the tank may still be hot.
Step 5: Open a Hot-Water Faucet
Go to a nearby sink or tub and open the hot-water side.
This helps allow air into the plumbing system as the tank drains.
Without an air path, the tank may drain slowly or unevenly.
A.O. Smith specifically recommends opening a hot-water faucet when draining a tank to help water flow more smoothly.
Leave that faucet open during the draining process.
Step 6: Open the Water Heater Drain Valve
Now slowly open the drain valve at the bottom of the tank.
Water should begin flowing through the hose.
Look at what comes out.
You may initially see:
Cloudy water.
Small mineral particles.
Brownish sediment.
White flakes or grit.
That is exactly what you are trying to remove.
If almost no water comes out, sediment may be clogging the drain valve.
Do not aggressively force or probe an old plastic drain valve. Older valves can become brittle, and turning a maintenance job into a broken valve and a leaking tank is not a good trade.
Step 7: Let the Tank Drain
Allow the tank to drain.
Depending on the size of the water heater, water pressure, hose setup, and amount of sediment, this can take some time.
A.O. Smith notes that many conventional water heaters take roughly 20 to 40 minutes to drain, although heavy sediment can make the process longer.
If your tank has not been flushed for years, don’t be surprised if the initial discharge looks dirty.
That is especially plausible in a hard-water area like Jacksonville.
Step 8: Flush the Sediment With Fresh Water
Draining removes water.
Flushing removes the junk left behind.
Once most of the tank has drained, leave the hose connected and drain valve open.
Briefly reopen the cold-water supply.
Fresh water will rush into the tank and stir sediment sitting along the bottom.
Let that water discharge through the hose.
You may see another burst of cloudy water or mineral debris.
Shut the cold supply off again and allow the tank to drain.
Repeat this process as needed until the water coming through the hose looks substantially clearer.
This is the part that makes a flush different from simply draining the tank.
Step 9: Close the Drain Valve
Once the discharge runs clear enough that you’re satisfied with the flush:
Close the drain valve completely.
Do not overtighten it.
Older plastic drain valves can be damaged if forced.
Remove the garden hose carefully.
Keep a towel or bucket underneath because some residual water will probably escape.
Step 10: Refill the Water Heater Completely
This step is extremely important particularly for electric water heaters.
Open the cold-water supply valve.
Leave the hot-water faucet you opened earlier running.
At first, you’ll probably hear air sputtering from the faucet.
Let it continue.
Eventually, you should get a steady stream of water without large bursts of air.
That tells you the tank is filling and air is being pushed out of the plumbing.
Rheem’s flushing guidance similarly instructs homeowners to refill the tank and run hot-water fixtures before restoring the energy source.
Step 11: Only Then Restore Power or Gas
For an electric water heater:
Do not turn the breaker back on until the tank is completely full.
This is worth repeating.
Turning on an electric water heater while the heating elements are exposed to air can damage them.
Once you have confirmed that the tank is full and water flows normally from your hot-water faucet, restore electricity at the breaker.
For a gas unit, restore operation according to the manufacturer’s instructions.
Step 12: Check Everything for Leaks
Return to the water heater and inspect:
- The drain valve
- Hose connection area
- Cold-water shutoff
- Hot and cold supply connections
- The surrounding floor
Pay particular attention to the drain valve.
Sometimes an older valve that has not been opened in years does not reseal perfectly after being disturbed.
A small drip that wasn’t there before should not be ignored.
How Often Should Jacksonville Homeowners Flush Their Water Heaters?
You will often hear once a year as a general maintenance recommendation.
But Jacksonville’s water hardness can justify paying closer attention.
Rheem currently recommends flushing as often as every six months in hard-water conditions, while also noting that the correct schedule depends on water quality and household usage.
That does not mean every Jacksonville water heater automatically needs a six-month schedule.
A practical approach is to consider:
- Your specific ZIP code’s water hardness
- Whether you have a water softener
- Household water usage
- The manufacturer’s maintenance requirements
- How much sediment comes out during each flush
- Whether the heater is making noise
If you flush annually and find a significant amount of mineral material every time, shortening the maintenance interval may make sense.

Why Your Water Heater Is Making a Popping Sound: Mineral Sludge Explained
A popping sound from your water heater usually means mineral sediment has collected at the bottom of the tank. As…
Read The BlogHow Hard Is the Water in Your Part of Jacksonville?
The answer can vary more than homeowners expect.
JEA’s current published figures include:
32207: approximately 298 ppm / 17 grains per gallon — Very Hard
32216: approximately 341 ppm / 20 grains per gallon — Very Hard
32217: approximately 285 ppm / 17 grains per gallon — Very Hard
32223: approximately 254 ppm / 15 grains per gallon — Very Hard
32224: approximately 297 ppm / 17 grains per gallon — Very Hard
32246: approximately 297 ppm / 17 grains per gallon — Very Hard
32256: approximately 336 ppm / 20 grains per gallon — Very Hard
32257: approximately 290 ppm / 17 grains per gallon — Very Hard
32258: approximately 289 ppm / 17 grains per gallon — Very Hard.
That’s why a generic water-heater maintenance schedule written for homeowners somewhere else in the country may not perfectly reflect what a Jacksonville tank experiences.
What’s That Popping Noise?
One of the classic homeowner complaints is:
“My water heater sounds like popcorn.”
That can happen when sediment accumulates near the bottom of the tank.
As the heater operates, water can become trapped around or beneath mineral deposits. Heating that water can contribute to popping, crackling, or rumbling noises.
A flush may help when the buildup is still manageable.
But if the tank is older and the sediment has hardened into a substantial layer, flushing may not remove everything.
When You Should NOT DIY the Flush
There are situations where calling a plumber is the smarter option.
Consider professional service if:
- The water heater is badly corroded
- The drain valve is damaged
- The valve will not open
- The valve starts leaking
- The tank has never been flushed and is quite old
- Very little water will drain because sediment appears to be blocking the valve
- You see water leaking from the tank itself
- You smell gas
- You’re uncomfortable shutting down or restarting the unit
- You’re unsure whether the heater is safe to service
Rheem specifically cautions that older tanks or units that have gone a long time without flushing may have hardened sediment, and attempting maintenance can expose existing problems such as leaking valves or deterioration.
Sometimes the safest thing you can do to an old water heater is not disturb a fitting that hasn’t moved in 12 years.
Don’t Confuse a Flush With a Repair
Flushing is maintenance.
It does not repair:
- A leaking tank
- A failed heating element
- A bad thermostat
- A failing gas valve
- A broken dip tube
- A severely corroded tank
- Excessive water pressure
- A malfunctioning temperature-and-pressure relief system
If the heater is leaking from the tank body itself, flushing isn’t the solution.
Likewise, if you have almost no hot water after flushing, another component may need diagnosis.
Should You Flush an Older Water Heater That’s Never Been Flushed?
This is where homeowners should use caution.
Imagine a 10- or 12-year-old water heater that has accumulated sediment for its entire life.
Suddenly opening a drain valve that hasn’t moved in a decade isn’t always routine maintenance anymore.
The drain valve may be brittle.
Heavy sediment may block the opening.
Existing corrosion may become apparent.
That doesn’t mean flushing causes a healthy tank to fail.
It means maintenance can reveal deterioration that was already there.
If your tank is near the end of its expected service life and has never been serviced, having it inspected before starting may be the better move.
What About Vinegar?
For a standard tank-style water heater, homeowners often assume they should pour vinegar into the tank because vinegar dissolves mineral scale.
Don’t improvise.
Follow the manufacturer’s instructions for your specific heater.
Tankless units often have formal descaling procedures involving vinegar or manufacturer-approved solutions. Rheem, for example, specifies virgin food-grade white vinegar for certain tankless flushing procedures.
A conventional tank flush, however, is normally performed by draining and repeatedly flushing the tank with fresh water unless the manufacturer specifies another process.
The JAX Water Heater Rule to Remember
Jacksonville’s hard water doesn’t mean your water is unsafe.
JEA specifically notes that hard water’s calcium and magnesium are naturally occurring and are not considered a health risk.
But your water heater doesn’t care whether those minerals are healthy for you.
It cares what settles at the bottom of the tank.
So if you live in Jacksonville and your water heater has been quietly working for years without ever being drained, put this maintenance item on your radar.
The basic process is:
Turn the heater off.
Shut off the cold water.
Let the water cool.
Connect the hose.
Drain the tank.
Flush with fresh water until the discharge clears.
Close the valve.
Refill the tank completely.
Then and only then restore power or gas.
It’s not complicated maintenance.
But with Jacksonville’s hard water, it can be especially worthwhile.
And if the tank starts leaking, won’t drain, or looks badly corroded while you’re doing it, that’s your cue to stop treating it as a DIY maintenance job and have the water heater inspected.
Don’t Let Sediment Damage Your Water Heater
Protect your system from JAX water buildup. Schedule a professional water heater flush today.